DIY Roof Covering Repair: A Step-by-Step Guide to Dealing With Common Issues
You can deal with common roof concerns on your own by starting with an extensive evaluation for visible damages like missing out on shingles or sagging areas. Collect essential tools such as a strong ladder, roof hammer, and matching replacement roof shingles. Patch leaks by sealing changing and flashing harmed roof shingles. Don't forget to maintain seamless gutters and warranty water streams openly. Normal checks aid prevent expensive repair work. There's plenty even more to explore! if you're prepared to discover even more regarding each action.
 roof repair
Evaluating Your Roof for Damage
Prior to you climb up onto your roofing, it's vital to evaluate it from the ground to recognize any noticeable indicators of damage. Look for missing roof shingles, crinkled edges, or staining that might indicate leaks.
Next, inspect your seamless gutters for granules from tiles or standing water, both of which can point to roofing issues. These can be indications of water damage connected to your roof. if you spot any stains on ceilings or walls inside your home.
Do not fail to remember to analyze flashing around vents and smokeshafts, as harmed flashing can lead to leaks. If you observe anything concerning, it's best to address it promptly to prevent extra comprehensive repair work later. Always prioritize safety, and do not hesitate to call an expert if needed.
Gathering the Needed Tools and Products
Before you begin your roof covering fixing, you need to gather the right tools and products. Understanding what necessary devices you'll need, producing a list of needed products, and focusing on safety equipment will certainly set you up for success. Allow's review what you'll require to tackle this project successfully and securely.
 roof repair
Crucial Devices Summary
A solid roofing repair work begins with the right devices and materials at your side. To deal with common problems successfully, you'll require a few essential devices. First, get a durable ladder to securely access your roofing. A roof hammer or a nail weapon will aid you safeguard roof shingles or other products. Do not neglect an energy knife for cutting roof products accurately.
Safety equipment is vital also; a set of work handwear covers and security goggles will secure you from sharp edges and debris. A measuring tape assurances specific dimensions while a lever assists get rid of damaged shingles. With these devices in hand, you'll prepare to manage numerous roofing repair services with confidence.
Required Materials List
With your devices ready, it's time to gather the materials needed for your roof covering repair service. Check your shingles. If they're damaged, acquire matching substitute shingles. You'll also need roof covering nails, a strong adhesive, and a sealant to assure everything remains watertight. Do not neglect a tarpaulin or roofing paper to shield exposed areas while you work. Think about buying a water-proof membrane as well if you're dealing with leaks. For blinking repair services, purchase new flashing products that fit your roofing kind. Order a pail or container for any type of debris you'll eliminate. Having all these products on hand will certainly make your repair service procedure smoother and extra efficient, so you can get the job done right.
Safety And Security Equipment Value
While you could be enthusiastic to begin your roof fixing, don't forget the importance of security gear. Using the ideal tools can prevent severe injuries and ensure you work successfully. Begin with a tough headgear to shield your head from dropping debris. Non-slip shoes are crucial for maintaining hold on the roof's surface area. Do not forget gloves; they'll maintain your hands risk-free from sharp tools and products. Safety safety glasses will certainly shield your eyes from dust and particles. A harness is a has to if your roof is high or steep, avoiding falls. Lastly, a first-aid package ought to constantly get on hand for minor injuries. Prioritizing safety and security equipment establishes you up for a protected and successful repair work job.
Covering Roofing System Leaks
When you discover a leakage, the initial step is identifying its source to assure an efficient patch. As soon as you identify the trouble, you'll need to choose the best materials for a long lasting repair. We'll stroll you with the ideal application methods to seal those leaks and protect your home.
Recognizing Leakage Resources
Just how do you pinpoint the resource of a roofing system leakage? Beginning by inspecting your roofing for visible damages or wear. If it's secure, climb up to your roof and aesthetically check for any kind of irregularities.
Selecting Spot Materials
Picking the appropriate spot materials is crucial for efficiently fixing a roofing system leak. Think about the type of roof covering you have-- shingle, metal, or level. For shingles, choose roof concrete or asphalt patches. A metal patch and sealer job best if you've obtained a steel roof. For flat roofing systems, utilize a specialized patching product made for that surface.
Constantly ensure the products are suitable with your existing roofing system to ensure a resilient solution. Inspect the weather condition conditions; some products need completely dry or cozy temperatures to stick appropriately. Finally, choose high-quality items to avoid constant fixings down the line. By picking the best materials, you'll establish on your own up for an effective patching job.
Application Methods Discussed
Applying spot materials efficiently is important for securing roof leaks and stopping further damage. Begin by cleansing the location around the leakage, getting rid of any type of debris, dust, or loose roof shingles. This assures a solid bond in between the roofing and the spot surface area. Next, reduce your spot product to fit over the harmed location, extending it a minimum of 2 inches beyond the edges of the leakage. Apply a charitable layer of roof glue or sealant to the location, after that press the spot securely into place. Smooth out any type of air bubbles and confirm the sides are well secured. Ultimately, apply an added layer of sealant over the spot borders for extra protection. Allow the spot to treat totally before subjecting it to rain or extreme weather condition.
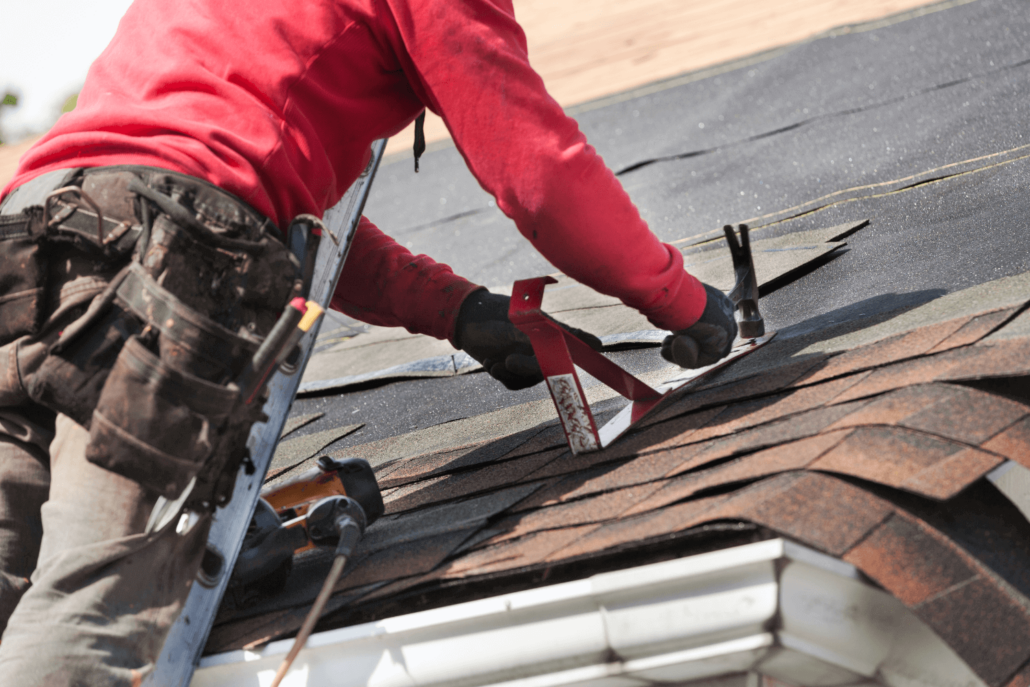
Replacing Broken Shingles
When you notice damaged tiles on your roofing, it's vital to deal with the problem without delay to stop further leakages and architectural damage. Start by gathering your devices: a lever, hammer, roof covering nails, and replacement roof shingles that match your present ones. First, meticulously lift the damaged roof shingles with your lever to remove it without interrupting the bordering shingles. Once it's complimentary, check the area under for any indicators of damage. If everything looks excellent, move the brand-new roof shingles right into place, straightening it with the others. Safeguard it with nails, seeing to it to follow the producer's guidelines for positioning. Bear in mind to cover the nail heads with a little bit of roof cement to ensure proper sealing. Tip back and examine your work to confirm a smooth look. With these quick steps, you can efficiently change broken shingles and maintain your roofing's stability.
Cleaning Up and Preserving Gutters
To keep your roofing in top problem, routinely cleansing and keeping your gutters is important. Stopped up gutters can lead to water damages, mold growth, and also architectural issues.
Next, flush your seamless gutters with a garden hose to ensure water streams freely. Look for leakages or rust places while you go to it. Think click the button about applying a sealer or changing affected areas. if you discover any kind of issues.
To avoid future obstructions, install seamless gutter guards or screens, and make it a practice to cleanse your gutters a minimum of two times a year, particularly prior to hefty rains or snow. Routine upkeep not only prolongs the life of your rain gutters yet additionally secures your whole roof covering system.
Sealing Roofing Vents and Flashing
Sealing roof vents and blinking is crucial for protecting against leakages and protecting your home from water damage. Begin by evaluating the areas around your roofing vents and blinking for any kind of voids or cracks.
Use the sealer generously, filling all fractures and voids, then smooth it out with your finger or a caulking tool for a neat finish. Make sure the sealant prolongs somewhat past the edges to develop a solid bond.
Enable the sealant to heal based on the supplier's instructions, generally a couple of hours or overnight. After sealing, it's a great idea to examine your job after a rainstorm to verify whatever stays watertight. Normal upkeep of your roofing system vents and flashing can save you from pricey repair work down the line.
Repairing and examining Roof Valleys
Roofing valleys are crucial areas where 2 inclines fulfill, and they play an essential duty in directing water away from your home. To check your roofing system valleys, begin by climbing up safely and looking for indications of damages like loose tiles, cracks, or particles.
For minor repair work, change harmed shingles and apply roof covering concrete to seal gaps. Taking treatment of roof valleys quickly will aid protect your home from water damages and expand the life of your roof covering.
Often Asked Questions
If My Roof Demands Replacement Instead of Repair?, how Can I Identify.
To figure out if your roofing system requires replacement, check for comprehensive damages, sagging locations, or missing out on shingles. Consider replacement over fixing. if leakages continue in spite of repair work or it's nearing the end of its life expectancy.
What Safety and security Preventative Measures Should I Take While Repairing My Roof Covering?
When repairing your roofing system, always wear a security harness and non-slip footwear. Make certain your ladder's stable, avoid operating in negative weather, and have a person close by to assist you in case of emergencies.
How Typically Should I Examine My Roofing for Damage?
You should evaluate your roofing system a minimum of twice a year, ideally in springtime and fall. After serious weather condition, look for damages also. Routine assessments can assist you capture concerns before they become costly fixings.
Can I Repair My Roofing System in Bad Climate Conditions?
You shouldn't try roof repair work in negative weather condition. Rain, snow, or strong winds can increase risks and make complex the procedure. Wait on clear conditions to ensure your safety and security and achieve a proper repair service.
If I Encounter Wildlife in My Attic Throughout Services?, what Should I Do.
If you come across wild animals in your attic room throughout repairs, stop instantly. Secure the location, avoid shocking the pets, and speak to an expert wildlife removal service to securely manage the circumstance before continuing your job.
Before you start your roofing repair, you need to gather the right devices and materials.A solid roof repair work starts with the right devices and products at your side.With your tools prepared, it's time to gather the materials needed for your roofing system repair work.Choosing the ideal patch materials is crucial for properly fixing a roof covering leakage. Taking treatment of roofing system valleys quickly will help shield your home from water damages and prolong the life of your roof.